
In the world of DIY home decor, creativity knows no bounds. One innovative trend that is gaining popularity is transforming simple egg cartons into textured wall panels. By stapling egg cartons onto plywood, you can create a unique, eco-friendly wall feature that adds depth and character to any room. This project is perfect for those looking to add a touch of rustic charm or an artistic flair to their home without breaking the bank. It’s an excellent way to repurpose materials and make a bold design statement.
This DIY textured wall panel can be styled in various ways to complement any interior design theme. For a rustic or industrial look, consider leaving the egg cartons in their natural state with their muted tones. Pair them with other natural materials like wood and metal for a cohesive aesthetic. For a more modern or eclectic vibe, paint the egg cartons in bold colors or metallic shades. This DIY piece can serve as an accent wall in a living room, a headboard in a bedroom, or even a backdrop in a home office. Enhance the textured effect by incorporating soft lighting that casts gentle shadows across the panels.
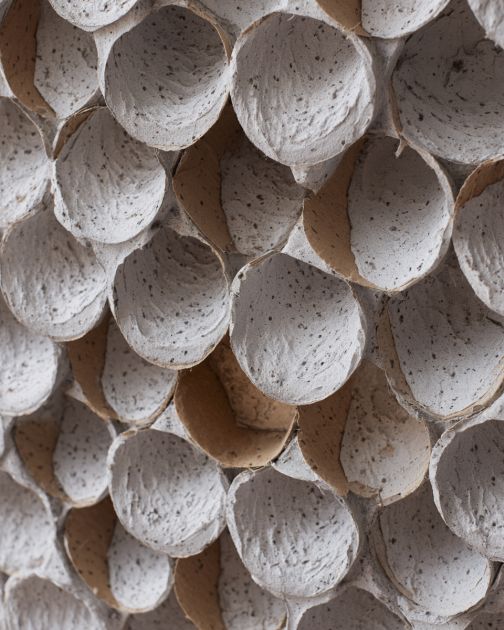
DIY Textured Wall Panel with Egg Cartons

Materials
Plywood sheet (size depends on desired wall panel dimensions, e.g., 4×8 feet)
Egg cartons (quantity depends on plywood size, e.g., about 60 for a 4×8 feet panel)
Staple gun with staples
Scissors or a utility knife
Paint and paintbrush (optional)
Measuring tape
Sandpaper (optional, for smoothing plywood edges)
Directions
Measure the area where you want to install the wall panel and cut the plywood to the desired size if necessary. Sand the edges for a smooth finish.
Collect enough egg cartons to cover the entire plywood surface. Cut the lids off the cartons, leaving only the egg-holding sections.
Begin stapling the egg cartons onto the plywood, starting from one corner and working your way across the panel. Overlap the edges slightly to create a continuous texture.
Continue stapling until the entire surface is covered. Ensure that the egg cartons are securely fastened and adjust as needed.
If desired, paint the egg carton surface in a color of your choice. Use a brush to reach into the crevices, or leave it unpainted for a natural look.
Allow the paint to dry completely if you have painted the cartons.
Install the completed wall panel in your chosen location, securing it to the wall with appropriate hardware.
Variations & Tips
For those looking to experiment with different styles, consider using colored or patterned egg cartons if available. You can also create a mosaic effect by painting each carton section in a different color. For added dimension, alternate the orientation of the cartons to vary the texture. If you prefer a less uniform look, try mixing in other materials like fabric or small tiles between the cartons. This project is highly versatile, allowing for endless customization to suit your personal taste and home decor.