
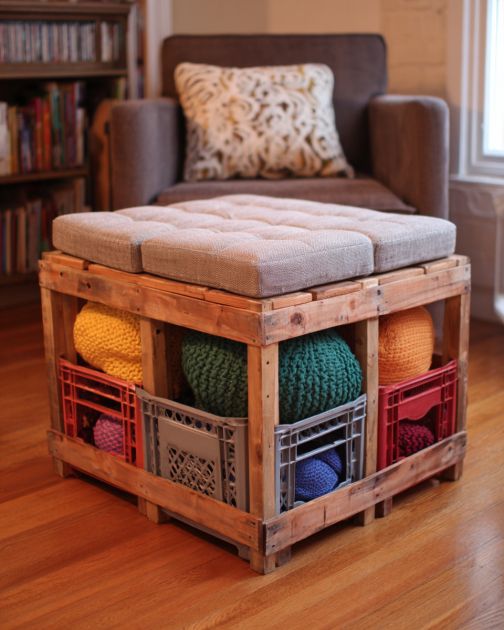
Transforming old and cracked plastic milk crates into chic and functional storage ottomans is a brilliant way to upcycle items that might otherwise be discarded. This DIY project not only saves money by repurposing materials you may already have, but it also allows you to customize your storage solutions to perfectly match your interior decor. A storage ottoman is a versatile piece that offers both seating and storage, making it ideal for small spaces or multipurpose rooms.
This DIY storage ottoman can be styled to complement a variety of interior design themes. For a modern look, choose a sleek fabric in solid colors like charcoal, navy, or beige. If your home leans towards bohemian or eclectic styles, opt for vibrant patterns or textured fabrics. Adding metallic or wooden legs can elevate the ottoman’s appearance and match other furniture pieces. Position the ottoman in the living room as a footrest or in the bedroom at the foot of the bed. It can also serve as extra seating in a small entryway or under a window.
Fabric-Wrapped Milk Crate Storage Ottoman

Materials
1 cracked plastic milk crate
1 yard of durable upholstery fabric
Foam cushion (sized to fit the top of the crate)
Plywood board (cut to the size of the crate top)
Staple gun and staples
Spray adhesive
Fabric scissors
4 furniture legs (optional)
Drill and screws (if attaching legs)
Directions
Clean the plastic milk crate thoroughly and allow it to dry.
Measure the crate and cut the fabric to fit around the sides, leaving extra fabric to fold over the top and bottom edges.
Use a spray adhesive to attach the fabric to the crate, smoothing out any wrinkles as you go. Fold the excess fabric over the top and bottom edges and secure with a staple gun.
Cut the foam cushion to fit the top of the crate. Use spray adhesive to attach the foam to the plywood board.
Wrap the plywood board with fabric, pulling it tight over the foam, and staple the fabric on the underside of the board.
Place the upholstered board on top of the crate to serve as the ottoman seat. Secure it in place with screws if desired.
If adding legs, drill holes into the bottom corners of the crate and attach the legs with screws.
Ensure everything is secure and sturdy before using the ottoman.
Variations & Tips
To customize your storage ottoman, consider swapping the upholstery fabric for faux leather or velvet for a luxurious touch. You can also experiment with different shapes, such as using multiple crates to create a longer bench-like ottoman. For added functionality, attach caster wheels instead of legs to make the ottoman mobile. Personalize your ottoman further by adding decorative buttons or tufting to the cushion top. With so many fabric and accessory options available, you can easily create a piece that reflects your personal style and fits well with your existing decor.